
Seven steps to export a DICOM scan dataset from Slicer as an .mhd file with .raw:
Scripts required: N/A
VIMEO link: https://vimeo.com/726184705
3D Slicer Download link: https://download.slicer.org/
Step by step:
- Download the latest stable release of 3D Slicer.
- Import your DICOM data into 3D Slicer using the DICOM module which you can access either through the DICOM button in the top left or through the modules drop down menu (fig.1).
- Inspect your data using the Volume rendering module also in the drop down menu. To see the volume you will need to turn it on using the eye icon.
- Select file in the top dropdown menu, then click save (fig. 2).
- When the save scene window opens, ensure only the model you want to export is selected (fig. 3). Change the file format to .mhd in its corresponding menu.
- Click the box for show options (fig. 4) at the top right of the window and deselect compress for the file (compressed files won’t import to Unity correctly).
- Select a location to export the file to and click save.
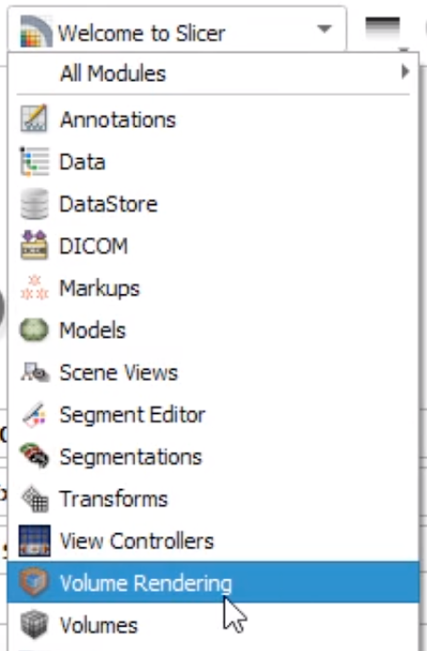
Fig. 1
Select the volume rendering module
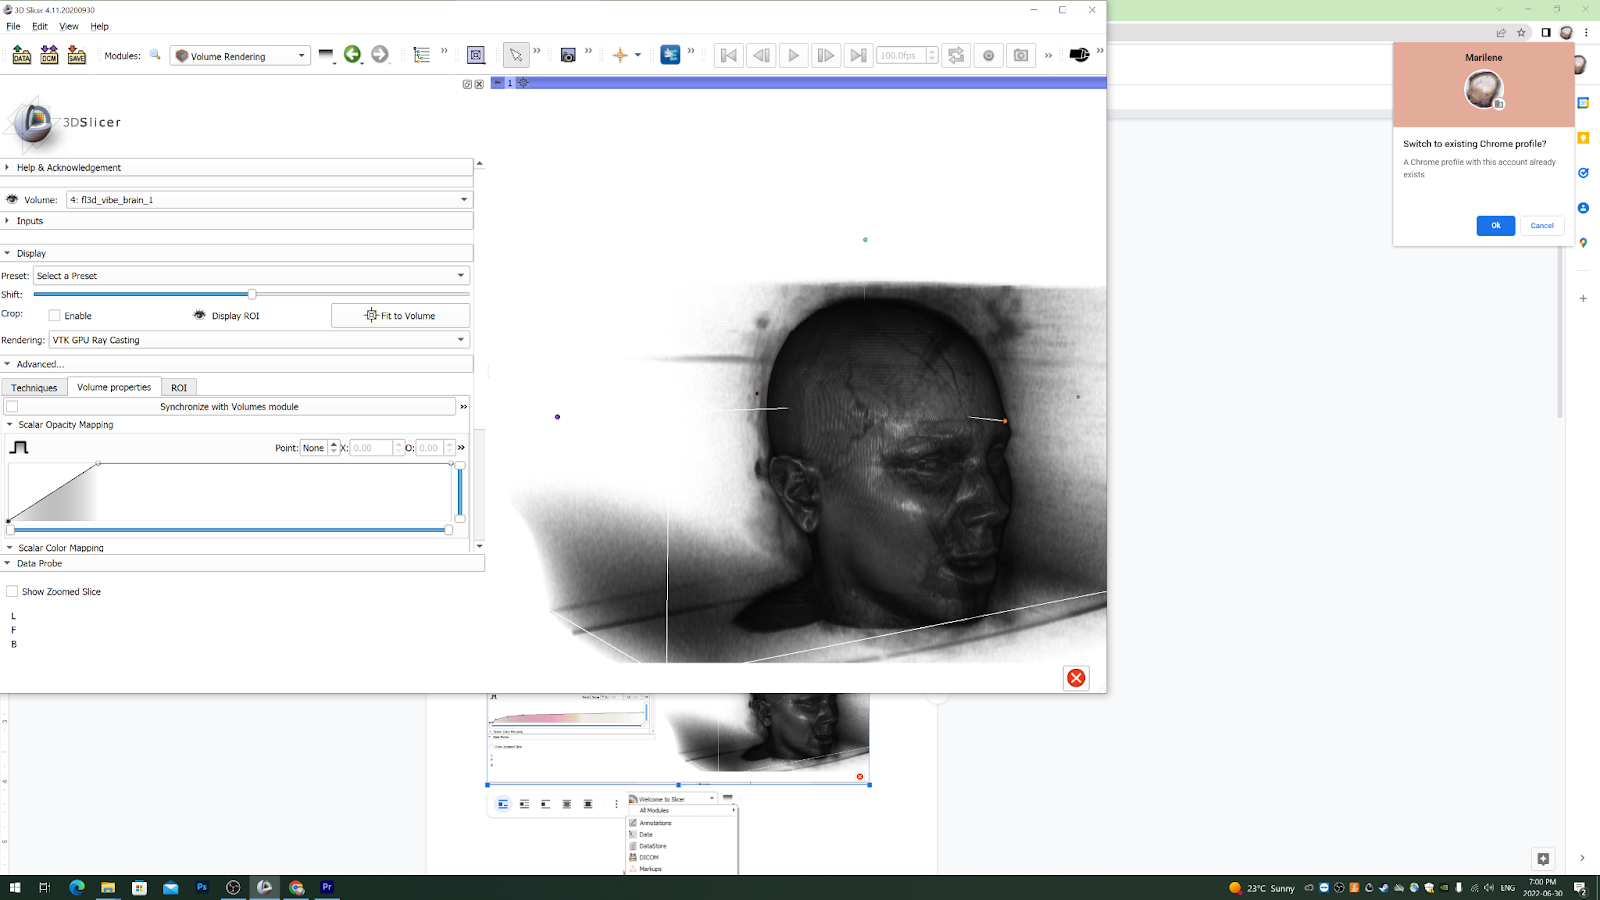
Fig. 2
Inspect your data as a volume rendering using the Volume Rendering module
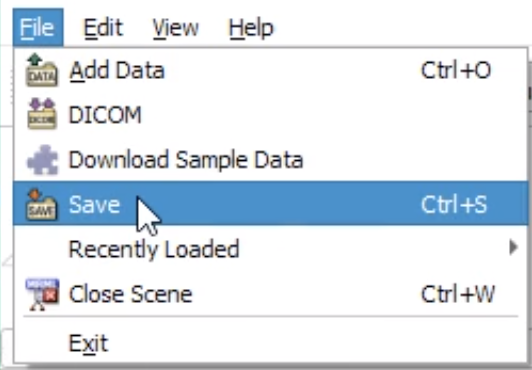
Fig. 3
File then save, or Ctrl+S (PC) to access save scene menu
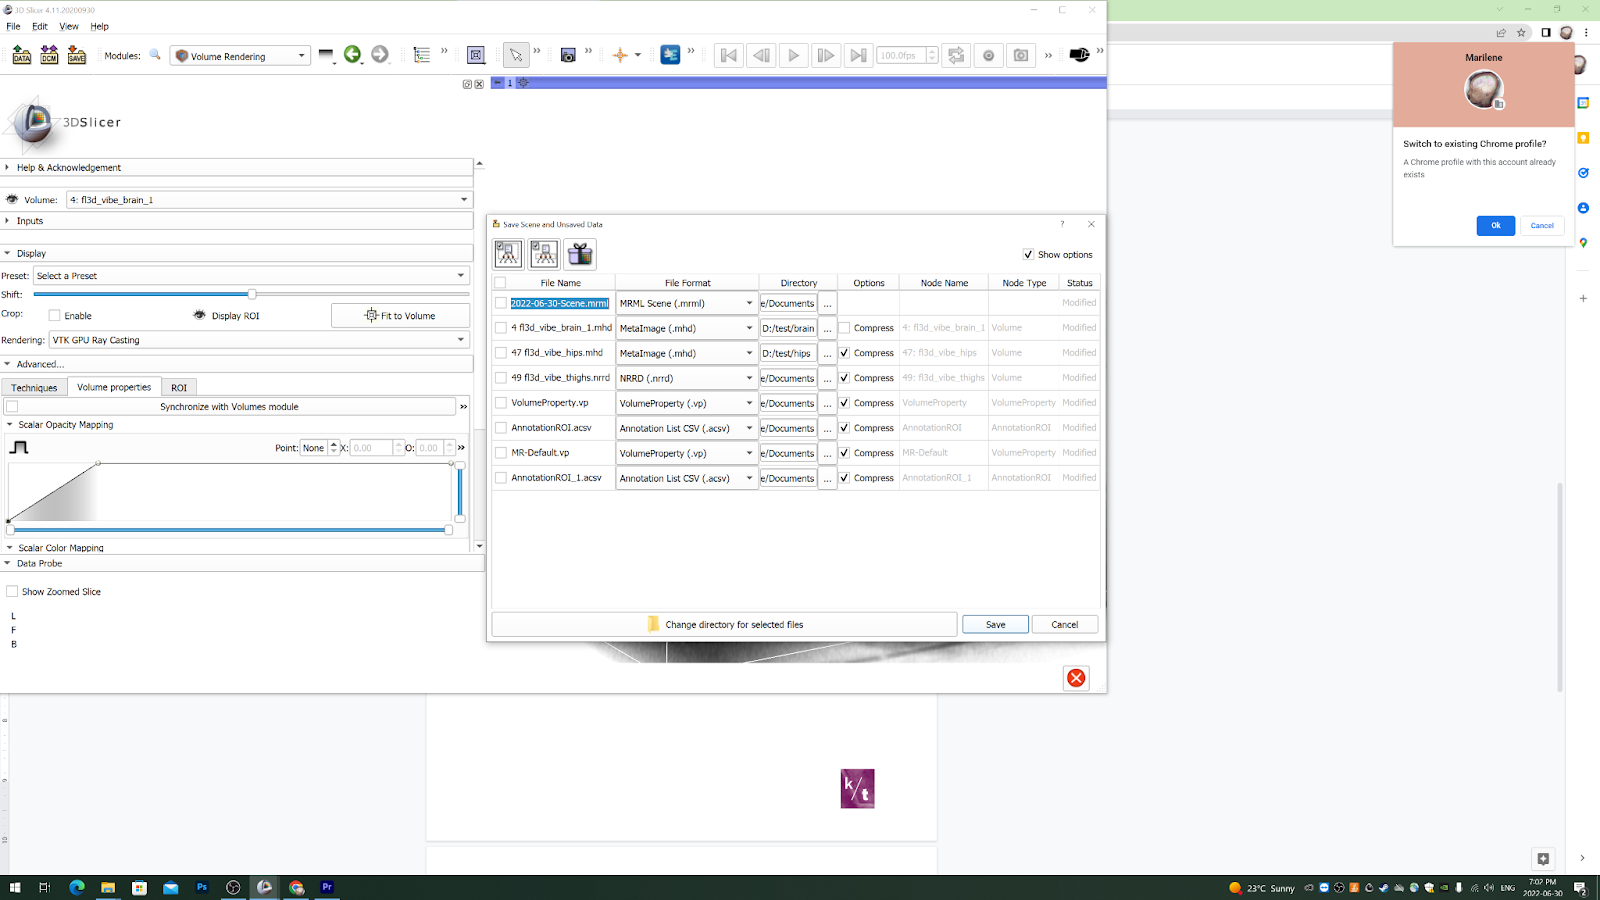
Fig. 4
Select only the model you want to export as an MHD and ensure compression is OFF
Note:
- Colors applied to the model prior to exporting will not show up in the .mhd file.