
Working Dynamically with PNG Files in Unity
How to export a PNG file for Unity, then import it into a project, make it a sprite, and attach scripts so that it can be thrown around in VR. Great for adding elements to a scene which would otherwise be too complex to make and run in Unity.
Scripts required: GenericLoader, Sprite Renderer, OVR Grabbable Extended, Manage Text Slice Movement, and more can be attached as desired!
GitHub link: https://github.com/Know-Thyself-as-a-Virtual-Reality/KTVR-DICOM-Tools
VIMEO link: https://vimeo.com/726184570
Step by step (preparation):
- If you don’t already have the Oculus Integration package with OVRPlayerController installed, instructions can be found here.
- Download the project file, which can be found here under DICOM Tools.
Step by step (getting your PNG ready):
- Create a greyscale image with a transparent background in a program such as Adobe Illustrator (tonal values will be maintained in Unity when colors are applied later, so it could be worth getting them looking right at this stage).
- If working in Adobe software, click File, then go to Export, then select Export As…. Make sure PNG is selected from the dropdown menu (fig. 1). Export the file; a larger file size is often better as it can be downsized in Unity as needed.
- Locate the Unity project folder on your computer and open the Assets folder within it. Then find the Resources folder and add an Images folder inside it.
- Move your PNG into the Images folder so Unity will have it ready to open.
Step by step (working with PNG in Unity):
- Open your Unity project, and in the Project window navigate through the folders (Assets, Resources, then Images) to find your PNG (fig. 2).
- Select the image in the Project window, then in the inspector, change Texture Type from Default to Sprite (2D and UI) (fig. 3). Click Apply at the bottom of the window to make the PNG into a sprite.
- Drag and drop the PNG sprite into the project hierarchy window and it should appear in the scene automatically (fig. 4).
- If the PNG sprite is too large, it can be resaved from Illustrator or resized in Unity by adjusting the Transform Scale in the inspector (fig. 5).
- Select the PNG sprite in the hierarchy and the Sprite Renderer should appear in the inspector (fig. 6). Here, color, orientation, etc. can be edited.
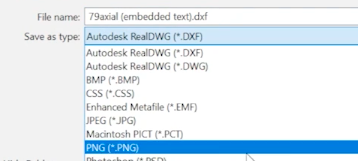
Fig. 1
Ensure that PNG is selected when exporting the file
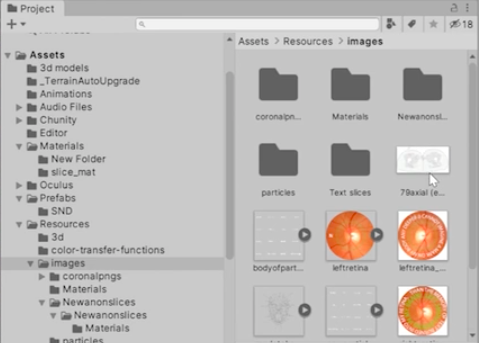
Fig. 2
Location of the Images folder as seen in Unity
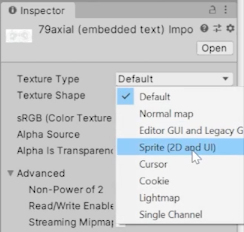
Fig. 3
The Texture Type for the PNG should be Sprite (2D and UI)
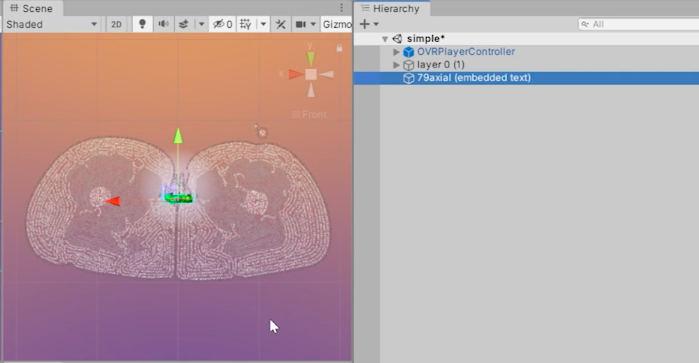
Fig. 4
Drop the PNG sprite into the Hierarchy (right) and it should appear in the scene (left)
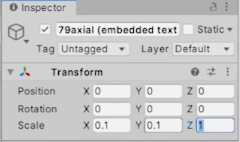
Fig. 5
Adjusting the sprite’s scale within Unity by changing Scale values under Transform in the Inspector window

Fig. 6
Sprite Renderer settings; here the color has been changed to red
Note:
- Some versions of Adobe software might feature a checkbox to toggle transparent background on/off when exporting PNG files
- If working with many PNGs, they can be organized within a game object
- Scripts are added by selecting the object in the hierarchy that you’d like to attach the script to, then simply clicking Add Component in the inspector window. You can search for and add scripts and components as desired
- Check out this tutorial on selecting and editing objects in VR for more!