
How to get started and use the GenericLoader script to import DICOM datasets into Unity, as well as control the dataset’s size, brightness and clipping planes.
Scripts required: GenericLoader
GitHub link: https://github.com/Know-Thyself-as-a-Virtual-Reality/KTVR-DICOM-Tools
VIMEO link: https://vimeo.com/730605297/dade0668bd
Note:
- It may be helpful to ensure that the default layout is selected (the dropdown menu can be found on the right side of the upper tool bar)
- The W, A, S and D keys can be used to navigate (A: left, W: forewords, etc.)
- The loader only works after you press play
Step by step (preparation):
- If you don’t already have the Oculus Integration package with OVRPlayerController installed, instructions can be found here.
- Download the project file (fig. 1), which can be found here under DICOM Tools (all the necessary links can also be found on the KTVR website).
- Extract the zip folder and open it in Unity.
- Put your data (.mhd and .raw files) in the project folder path: “Assets/Resources/datasets/” Or Another Path of your choosing in the Assets/Resources/ folder.
Step by step (importing your own dataset):
- In the hierarchy window to the left, select the dataset. All components attached to the dataset GameObject should appear in the inspector window.
- In the “Generic Loader” component, change the “Raw File Name” (fig. 2) to the name of your dataset (i.e. <your-dataset>.raw). In this case, it was changed to “vibe-chest.raw”.
- Press the play button at the top of the window and your dataset should load in. (go to 00:05:43 in the video to skip Windows 11 troubleshooting)
- You can upload different color transforms to the “Assets/Resources/color-transfer-functions/” folder (fig. 3) to alter the dataset’s colors (see this tutorial to learn more about color transfer functions.
- Use the “Brightness” slider to alter the dataset’s brightness (fig. 4).
Tips and troubleshooting:
- The color transforms (which modify the appearance/color of the dataset) are in the folder: Assets/Resources/color-transfer-functions (fig. 5). They need to stay in this folder or else it will break. They can be modified in the “Generic Loader Component” in the dropdown list labeled “Dropdownxml” (fig. 6).
- The data can be “clipped” away using the “Generic Loader” script using the sliders “Clip Dim 1, 2 and 3”. Each slider controls a different clipping plane.
- The “Generic Loader” also allows you to change the scale of the object. Scale cannot be changed like you would a normal game object, you need to use the “Vol Scale” slider in the “Generic Loader”.
- Invert scale allows you to change the space of the data (if necessary). Sometimes, the data is imported mirrored, if that happens, toggle the setting “Invert Scale” in the “Generic Loader” component.
- The “Generic Loader” automatically detects the dimensions of your datasets. This can be viewed in the Generic Loader under the “Dim” property. Dimensions of data have to be a power of 2 (i.e. 16, 32, 64, 126, etc..) See this tutorial about resizing datasets for Unity.
- When the project is built, you will need to create an Assets/Resources folder in the build directory with the following folders: dataset, color-transfer-functions. (fig. 7) Populate each with the dataset(s)/color transfer functions you have in your project (see the build folder in the tutorial’s GitHub project).
- To fix issues with Unity’s play button not working on Windows 11 (starts at 00:04:56 in video), close Unity with the Task Manager and reopen. Then select the OVRPlayerController in the hierarchy and toggle it off in the inspector window on the right side (fig. 8).
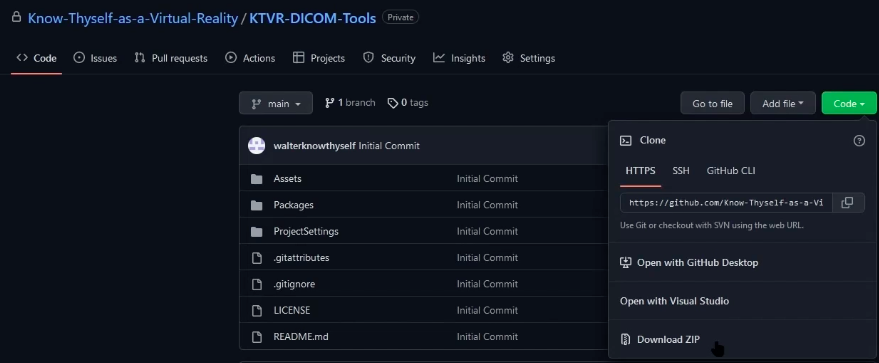
Fig. 1
Download the project ZIP file from GitHub
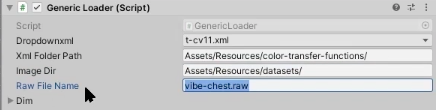
Fig. 2
Change raw file name to match the name of your dataset
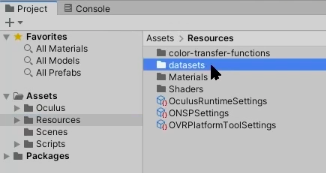
Fig. 3
Datasets folder within the resources folder

Fig. 4
Using the brightness slider
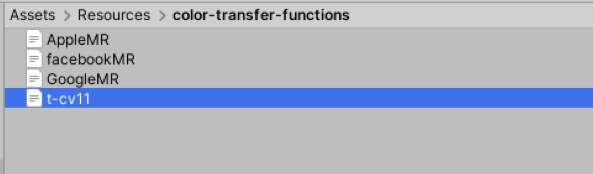
Fig. 5
Color transfer functions in the resources folder (leave them in this folder)
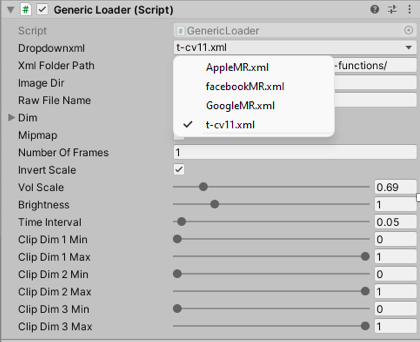
Fig. 6
Dropdownxml menu (located on right side toolbar)
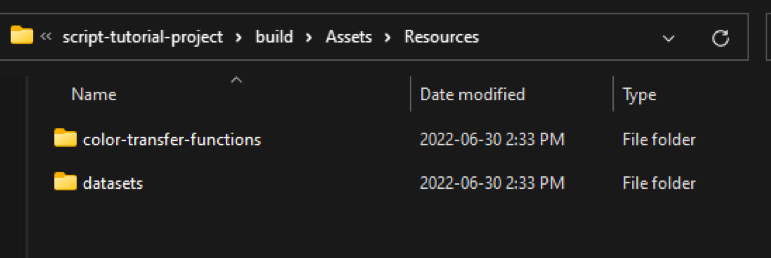
Fig. 7
Color-transfer-functions and datasets folders
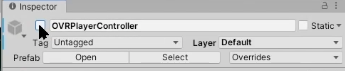
Fig. 8
Turn off and on OVRPlayerController if it causes problems for Windows 11 users